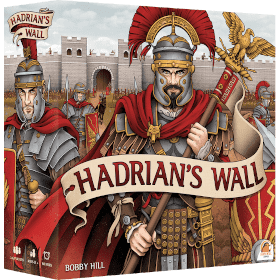
하드리아누스 방벽
 때는 서기 122년, 로마 제국 제14대 황제 하드리아누스 아우구스투스는 브리타니아 북부를 방문합니다. 제국 최북단에 위치한 이곳에서 황제는 로마군과 국경 너머의 야만인, 픽트족 사이에 계속된 전쟁의 여파를 목격합니다. 전쟁을 멈추기 위해서라도 로마 제국의 강대한 국력을 보여줄 필요가 있다고 생각한 황제는 잉글랜드 본토와 픽트족 영토를 완전히 분리하는 길고 커다란 방벽을 지을 것을 명하였습니다. 이것이 서쪽 솔웨이 만에서 동쪽 월센드까지, 길이만 117km에 달하는 위대한 ‘하드리아누스 방벽’입니다. 하드리아누스 방벽은 로마 제국이 몰락할 때까지 거의 300년을 버텼습니다. 요새, 탑, 망루 등의 폐허를 둘러볼 수 있는 오늘날에는 유네스코 세계유산으로 등재되었습니다.
하드리아누스 방벽에서 여러분은 로마 제국의 장군이 되어, 황제의 명을 따라 국경을 수호할 거대한 방벽을 건설해야 합니다. 황제가 허락한 여섯 해의 시간 동안 성벽과 요새를 완성하고, 군사를 훈련하고, 행정 · 상업 · 여가를 비롯한 다양한 제반 시설을 마련해 시민들을 불러모으세요. 물론, 그동안 야만스러운 픽트족으로부터 로마 제국을 지키는 일도 게을리해서는 안 됩니다. 불명예스러운 추문 없이 명성을 가장 높이 떨친 플레이어는 황제의 인정을 받고, 모든 로마 시민이 선망하는 ‘레가투스 레기오니스’의 칭호를 얻게 될 것입니다!
플레이어 수: 1 - 6
게임 시간: 22 mn
복잡성: 3 / 5
하드리아누스 방벽 및 다른 게임 1256개를 온라인으로 즐겨보세요.
다운로드가 필요없으며, 웹 브라우저에서 바로 플레이할 수 있습니다.
친구들과 그리고 전세계의 수많은 게이머들과.
무료.

하드리아누스 방벽 및 다른 게임 1256개를 온라인으로 즐겨보세요.
다운로드가 필요없으며, 웹 브라우저에서 바로 플레이할 수 있습니다.
친구들과 그리고 전세계의 수많은 게이머들과.
무료.

규칙 요약
Overview
The game is played over 6 years (rounds) where players take actions until everyone passes and then any unused Workers and Resources are discarded to the general supply, each Year concludes with an attack from the Picts and you must try to defend yourself!
Start of Year
Turn over a new Fate Card and everyone gains the resources listed
Each player draws 2 personal cards and chooses one for a Path and the other for a Prospect
The Path option looks at the top "sky" part of the card which will suggest an objective which will grant extra points if achieved
The Prospect option looks at the lower left tag which will provide additional starting supplies
After this decision has been made, players gain extra supplies based on what they have filled in so far:
1 Resource per filled space in Resource Production
1 Civilian per filled space in Hotel
1 Builder per filled space in Workshop
1 Attribute per filled space in Road
Turns
Advice
Due to difficulties with implementing an effective undo system, it is advised that players plan their entire go BEFORE picking their Path Card, perhaps as an Excel Spreadsheet (beginning with starting supplies, subtracting supplies for costs and adding supplies for bonuses, don't forget to track chain bonuses e.g. if you get to advance on another track which also gives a bonus) until you're happy that you've spent your supplies effectively and end the turn with minimal wastage
Please note that if you intend to use the above system, extra supplies are distributed AFTER Path selection, and as such the supplies it says you have may not be all you have to use that turn
The main phase allows players to use their supplies to take actions which involve filling in spaces from left to right on various tracks and perhaps gaining extra supplies if the space filled contained an icon
The cost to advance on a track is shown in the banner where that track's name can be found
Some areas work slightly differently, maybe filling in a different direction or being filled in whatever order you like
If a space has a "#" icon, it is filled with the year number rather than shaded in
There are 22 different action area types, some of which having multiple different sub-tracks within them
These are split into the Left Board and Right Board, which although functioning in similar ways, each board compliments tracks within it
Left Board:
Cohorts
Mining and Foresting
Wall Guard
Cippi / Wall / Fort
Granaries
Resource Production
Training Ground
Hotels / Workshops / Roads
Forum
Landmarks
Attributes
Right Board:
Citizens
Precincts
Market
Theatre
Ludus Gladiatorius
Gardens
Temples
Baths
Courthouse
Diplomats
Scouts
Left Board Tracks
Cohorts
These cannot be filled in directly, but instead can be filled as bonuses from other tracks (Red Shield Icon). These are your main objective tracks in order to be the most defensive against Picts as you can be during End of Year phase
Mining and Foresting
This track costs Servants and allows you to gain Resources and increase your Resource Production to gain more Resources at Start of Year. The advancement is limited up to the first road until you upgrade your Granary.
Wall Guard
This can either be filled in directly costing Soldiers, or indirectly with the Sword Icon Bonus from other tracks. This can grant you Cohort advancements or Discipline advancements. The advancement is limited up to the first road until you upgrade your Granary.
Cippi / Wall / Fort
These three are tracks in their own right, but are literally connected to each other. In order to advance on either the Cippi or the Wall, the Fort MUST be at or exceeding the level you wish to advance the other by (e.g. a level 3 Fort will allow you to reach a Level 3 Wall and/or a Level 1 Cippi, to reach Level 4 Wall and/or Level 2 Cippi you MUST advance the Fort to Level 4) the connected ropes will show you how far you can upgrade
The Fort either costs 1 Builder OR 1 Soldier, whilst the Cippi and Wall each cost 1 Resource. The orange flag markers on the Fort track are your Infrastructure Level, and you are required to have a certain level of Infrastructure in order to build Hotels, Workshops, Granaries, and Roads. The other things these can gain you are Civilian pieces (remember these need to be spent or lost at Year's End), Discipline, Renown, Cohort Advancement
The advancement of all 3 is limited up to the first road until you upgrade your Granary.
Granaries
You automatically have a Small Granary, which allows you to advance on tracks on the "Left Field"
It costs Level 1 Infrastructure, 1 Servant, 1 Builder, AND 1 Resource to upgrade to the Medium Granary. This gains you access to tracks in the "Centre Field"
It costs a Medium Granary, Level 5 Infrastructure, 1 Servant, 1 Builder, AND 2 Resources to upgrade to the Large Granary. This gains you access to tracks in the "Right Field" + 1 Renown
Resource Production
This cannot be filled in directly, but instead can be filled as bonuses from other tracks (Hammer Icon). This gives you more resources in Start of Year
Training Ground
This costs 1 Builder and can only be taken ONCE per year. This gives you a Sword icon bonus which will advance the Wall Guard track.
Hotels / Workshops / Roads
These tracks aren't connected, but function in a fairly similar way. The Upgraded Large versions override the Start of Year bonus of the Small version.
The Small Hotel costs Level 2 Infrastructure, 1 Servant, 1 Builder, AND 1 Resource. It gains you a Civilian piece immediately then 1 Civilian piece at each Start of Year
The upgraded Large Hotel costs Small Hotel, Level 6 Infrastructure, 1 Servant, 1 Builder, AND 2 Resources. It gains you a Civilian piece and a Renown immediately then 2 Civilian pieces at each Start of Year
The Small Workshop costs Level 3 Infrastructure AND 3 Resources. It gains you a Builder piece immediately then 1 Builder piece at each Start of Year
The upgraded Large Workshop costs Small Workshop, Level 7 Infrastructure AND 4 Resources. It gains you a Builder piece and Renown immediately then 2 Builder pieces at each Start of Year
The Small Road costs Level 4 Infrastructure, 2 Servants, 1 Builder, AND 1 Resource. It gains you EITHER a Piety OR a Discipline immediately then 1 of Renown/Piety/Valour/Discipline at each Start of Year
The upgraded Large Road costs Small Road, Level 8 Infrastructure, 2 Servants, 1 Builder, AND 2 Resources. It gains you EITHER a Renown OR a Valour immediately then 2 (same or different) of Renown/Piety/Valour/Discipline at each Start of Year
Forum
ONCE per year, this costs 2 non-Soldiers to gain 1 non-Soldier
Landmarks
For each Landmark, it costs 15 in the associated Attribute, 1 Builder, AND 2 Resources. You will then gain 2 advancements in a different attribute as indicated.
Attributes
These can't be filled directly, but are gained indirectly through advancing on other tracks. Each filled space here will be worth 1 VP at game's end, as well as an assortment of immediate effects.
Right Board Tracks
Citizens
Citizens are the means to unlock the building tracks on the Right Board
Each citizen costs either a Civilian OR its associated bonus icon. They gain you the icons mostly already discussed in the Left Board section: worker pieces, Resources, and Attribute track advancement. However, they also contain flags under certain progression points, similar to the Fort, which allow you to unlock certain buildings. The associated building are along the same row as the linked Citizen, so are easy to find and reference.
Precincts
The Small Precinct costs a Level 3 Trader, 1 Servant, 1 Civilian. This gains you 1 Piety, 1 Resource Production, and 1 Resource
The Medium Precinct costs a Small Precinct, a Level 6 Trader, 1 Servant, 2 Civilians. This gains you 1 Discipline, 1 Resource Production, and 1 Resource
The Large Precinct costs a Medium Precinct, a Level 9 Trader, 1 Servant, 3 Civilians. This gains you 1 Renown, 1 Resource Production, and 1 Resource
Market
To initially build the market, it costs a Level 4 Trader, 1 Servant, 1 Builder, AND 2 Resources. This gains 1 Renown and unlocks the Market.
After which, you may, at a cost of a Trader of a certain Level AND 1 Resource, trade in any box in any order
To trade, you either give the 1 Resource to the supply to trade with the Fate Deck or to a neighbour to trade with a player
After which, write the number showing under the trade good (the blue roll on the right banner) into the space you used
The first 3 unique numbers gain you 1 Renown each, the 4th and 5th unique number gains you 2 renown each, and your 6th unique good gains you 3 renown. Duplicates of previously gained numbers grant you nothing.
Theatre
To initially build the theatre, it costs a Level 1 Performer, 1 Servant, 1 Builder, AND 1 Resource. This gains 1 Renown and unlocks the Theatre.
After which, ONCE per year, you may complete a performance, at a cost of a Performer of a certain Level AND 1 Resource, these boxes can be filled in any order and provide various rewards such as Attribute advancements, Citizen Advancements, and Soldiers & Servants
Ludus Gladiatorius
To initially build the ludus gladiatorius, it costs a Level 3 Performer, 2 Servants, 1 Builder, AND 2 Resources. This gains 1 Renown and unlocks the Ludus Gladiatorius.
After which, at the cost of either 1 servant or 1 civilian and a Performer Level shown above the left-most available spot of that colour Gladiator, you may increase its strength by circling that spot. Red and Blue Gladiators can be trained in either order and you do not need to finish one before starting another, e.g. you can have a level 3 red and level 5 blue
In addition, each gladiator may be sent into battle ONCE per year (so two battles per year across both). To do this, draw a card from the Fate Deck and observe the number next to the purple Gladiator then fill this many circles in up to the amount you previously outlined i.e. if you have 2 circles outlined and draw a purple 3, only fill in 2 circles. If all circles are now filled in, this gladiator can NOT train any further as they are now dead, look below their rightmost circle and gain this many Piety if any. However, if they still have unfilled circles, they can continue to train, and gain the reward linked to their rightmost circle along the green tick row.
Gardens
The Small Garden costs a Level 4 Priest, 1 Servant, 1 Builder, AND 1 Resource. It gains 1 Piety, 1 Trader Level, 1 Performer Level, 1 Priest Level
The Large Garden costs a Small Garden, a Level 7 Priest, 1 Servant, 1 Builder, AND 2 Resources. It gains 1 Piety, 1 Trader Level, 1 Performer Level, 1 Priest Level, 1 Apparitor Level, 1 Patrician Level
Temples
The Small Temple Costs a Level 1 Priest, 1 Servant, 1 Builder, AND 1 Resource. It gains 1 Piety.
The Medium Temple Costs a Small Temple, Level 3 Priest, 1 Servant, 1 Builder, AND 2 Resources. It gains 1 Piety.
The Large Temple Costs a Medium Temple, Level 6 Priest, 2 Servants, 1 Builder, AND 2 Resources. It gains 1 Piety.
After at least 1 Temple is built, it can start being used. However, to use the Medium temple the Small temple needs to be fully used, and to use the Large Temple the Medium Temple needs to be fully used. i.e. you can have all three temples built BUT you can only use the Small Temple first
To use a temple, you work from top to bottom and left to right, filling in one row completely before moving to the next. The cost is a certain Priest Level as shown plus 1 Worker of your choice. You may gain nothing on some spaces. Other spaces gain you 1 Piety and/or can circle a Favour ready to be used.
Baths
To initially build the baths, it costs a Level 3 Apparitores, 2 Servants, 1 Builder, AND 2 Resources. This gains 1 Renown and unlocks the Baths.
Even once unlocked, the Baths can't be immediately used, you MUST have Disdain in order to take the action (You can't prepare for Disdain)
Disdain is shown as a blank circle, whilst when you use the baths you fill in the circle
The bath areas can be used in any order but you may only take TWO baths per year
Depending on which bath option you choose, you will need varying Levels of Apparitores and varying quantities of Resources as depicted
Courthouse
To initially build the Courthouse, it costs a Level 4 Apparitores, 2 Servants, 1 Builder, AND 2 Resources. This gains 1 Renown and unlocks the Courthouse.
After which, you can use ONE box in EACH column per year in any order (i.e. up to 3 boxes) as long as you have the depicted Apparitores Level and any required Workers in order to gain extra Workers
Diplomats
The Diplomats can be gained in any order
They cost the depicted level of Patricians (1/3/6), 1 Servant, 1 Soldier, AND 2 Resources. At the point of gaining them, you MUST immediately pick which Cohort (Left/Centre/Right) to assign them to by filling in that arrow, then circle the two Favours ready to be used, and gain 1 Valour. New Diplomats can NOT be assigned to the same Cohort as previously assigned Diplomats.
Scouts
The Scouts can be used in any order, but cost a depicted Patrician Level AND 1 Soldier
Choose a Prospect card from either your own or either of your Neighbours, and take the pattern shown on it to fill in the grid in any orientation, flipped, mirrored, however suits you. Only restriction is it must NOT hang off the map or previously filled in spaces. If you used your own, the Soldier goes to the supply, if you used a neighbour's, they get it. You gain any box based rewards immediately, and also if you fill in a row completely you will gain 1 Valour
End of Year
Once all players have passed, the year ends
Any remaining Resources and Workers are discarded to the main supply
Then the Picts attack, draw a number of Fate cards equal to what the current year's difficulty states
Look at the three arrows at the top of the cards drawn and see which ones are coloured in red, this shows how many attacks will concern the left, centre, and right Cohorts of every player
Players then each check how many boxes they have filled in the concerned Cohorts and whether this equals the number of red arrows for that Cohort
If you succeed, you gain Valour equal to that depicted in the grey box, fill this in and if you gain anything, get it now and it will carry over to next year
If you fail, you gain Disdain for each attack failed but only up to the value in the grey box, i.e. if you fail 3 attacks but the value in the grey box is 2 then you only take 2 Disdain
If you succeed some and fail others, you gain a mixture of Disdain and Valour, but only up to the value in the grey box with Disdain taking priority. In other words, if grey box is 2, you fail 1 and succeed 1, you get 1 V and 1 D, if you fail 2 and succeed 1 you gain 2 D and 0 V (Disdain gets priority)
If you have Favour from either Temples or Diplomats, you may use it to ignore one whole card of your choice (Or a card that targets the correct Cohort in the case of Diplomats)
End of Game
The game ends at the end of Year 6
Any supplies gained during the Year End phase of Year 6 are discarded
The player with the most points wins
If tied, the player with the least Disdain wins
If still tied, the player who gained most points only from Path Cards wins

